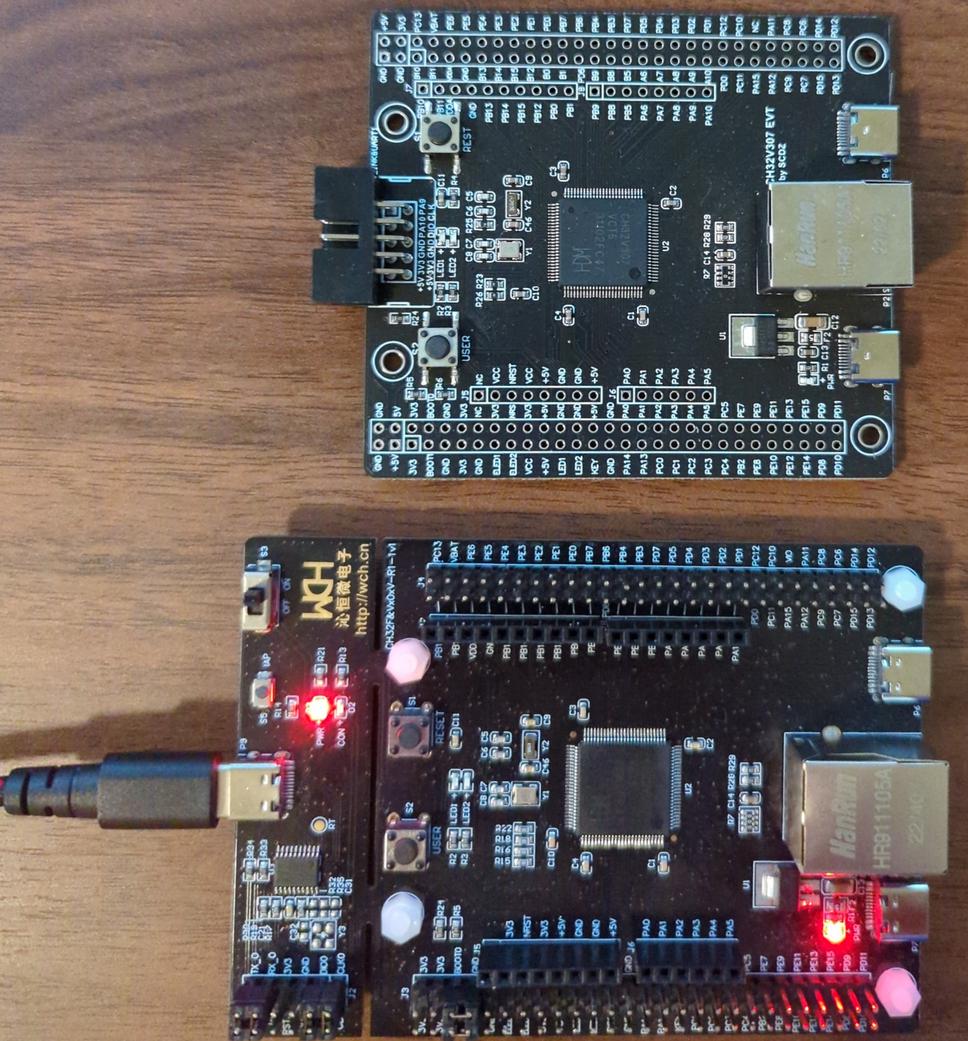
ch32v307 dev board
The CH32V307 microcontroller caught my interest because it has both IEEE 1588 timer hardware and the capability to connect via gigabit ethernet. If I ported my NTP server software to it, this would lower the round trip latency (excluding processing time) by around 10x. It's a RISC-V based microcontroller, running at 144MHz. The bare microcontroller is also currently $3.52 for 1 at LCSC.
This is part of a series on the ch32v307 dev board
To connect via gigabit, the chip has a gigabit MAC but it would need a gigabit PHY (connected via RGMII) to manage the physical connection. Gigabit will require a custom board design, so that's on my "I should do that eventually" list.
To experiment, I ordered a pair of dev boards. They only have 10M ethernet because that doesn't require an external PHY on this chip. But that's plenty to get a proof of concept up and running.
Since this is the first RISC-V board I've used, the first step I'm going through is picking out what my development environment looks like. There's quite a few projects recently around the cheaper ch32v003 chip that I can learn from.
Programming the microcontroller
I tried programming a few different ways
If you pull BOOT0 high and leave BOOT1 low, the built-in rom bootloader shows up as a USB in-circuit programmer device. The rust wchisp tool works to program the microcontroller. This doesn't require an external WCH-LinkE device, but it does require physically fiddling with the boot pins in order to program.
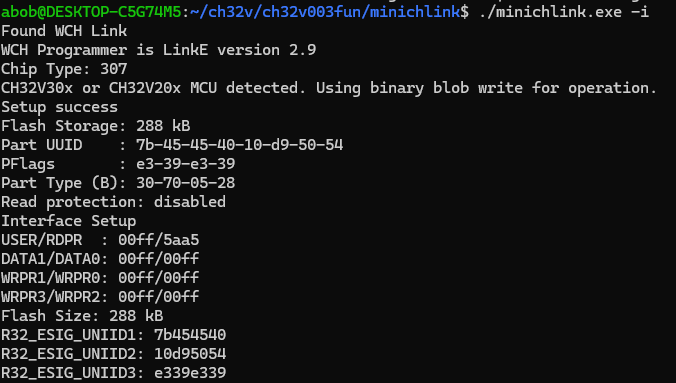
If you do have a WCH-LinkE device, I've found the best success programming with cnlohr's minichlink. On Linux, you'll need to adjust udev rules for your user to have permission to talk to the wch-link (the file 99-minichlink.rules helps with that).
If you're using WSL2 on Windows, you can use the pre-compiled minichlink.exe (along with libusb-1.0.dll). You first have to switch the Windows driver for the WCH-Link debug interface over to winusb (I used zadig to do this). There's also a serial interface (on Interface 1 for me), you can leave that alone. The serial interface should be using the usbser driver by default.

After that, you can run minichlink.exe directly in the WSL2 terminal:
The minichlink flags I use to program are: minichlink.exe -a -w build/example.bin 0x08000000 -b
Compiler
I'm using the RISC-V gcc compiler
Example code
The official code examples vendor code is listed as the Apache-2.0 open source license.
I've taken a few of those examples and adapted them to using a Makefile. Credit goes to Greg Davill to setting up the original Makefile. https://github.com/ddrown/CH32V307-makefile-example/tree/main/examples
One of the things that surprised me is LED1/LED2 aren't connected to a pin on my dev board, they're connected to header J3. You have to wire them up to a GPIO of your choosing with a jumper to get the blink example to produce light. The switch is also on that header as "KEY". ELED1/ELED2 are the two LEDs on the ethernet jack.
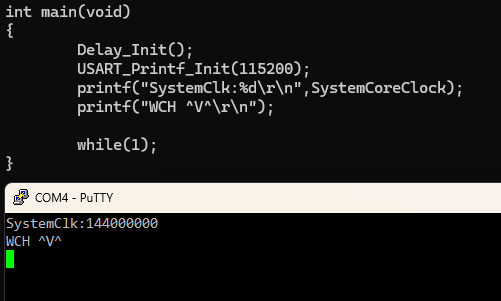
In the Makefile examples repo, printf is setup to print to USART1 via the function _write in vendor/Debug/debug.c. This goes to the WCH-Link's serial port, and you can use a regular serial terminal to interact with it.